How to make a mosaic - Step by step
Are you new to mosaics and want to know how you make a mosaic step by step?
You’re in the right place! In this tutorial we will show you how to make a mosaic alongwith how to grout a mosaic. We’ll also explore what techniques are used to create mosaics.
Before we begin, let’s take a look at what is mosaic art?
Mosaic art is a form of art created by making an image or a pattern using pieces of coloured glass or ceramic tiles that have been fixed into place with glue or plaster. It can be grouted or ungrouted as a finished art piece. The glass or tiles used to create the mosaic can be regular or irregular in shape and vary in colours. Mosaic tile patterns range from simple alternate colours to detailed and intricate designs. Mosaic art can be created on many surfaces and is a celebrated artform all around the world.
So how can you make a mosaic at home?
Here’s where the fun begins! If you’re new to mosaics you might opt for one of our DIY mosaic craft kits for your first attempt at mosaics. These are a complete mosaic in a kit, they come with easy step by step instructions and all the items you need to create your piece of mosaic art. You can browse our DIY mosaic craft kit range here.
If you’re feeling a bit more adventurous and want to create your own mosaic project here’s how to get started:
1. Choose your base/mosaic surface. You might already have an item at home that you would like to upcycle, or you can choose from our range of bases here.
2. Decide on the final location for your mosaic art. Will it be indoors or outdoors? Does it need to be waterproofed?
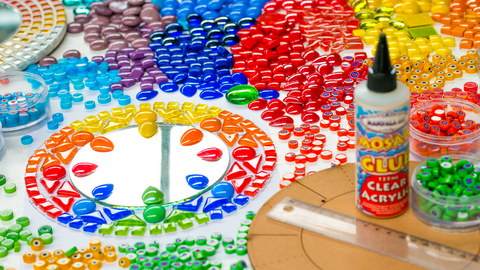
3. Choose your mosaic glass and tiles. Now that you know what surface you are going to mosaic and where you want to put it, it’s time to choose the right mosaic tile for your project. If you are going to keep your mosaic outdoors, it’s important to choose a tile that is resistant to sun exposure. Our Stained Glass range, Mini Vitreous Glass and Pebbles & Gems collections are some great options for outdoor mosaics.
When choosing your glass and tiles, think about the finished effect you want to create. Choosing glass in variations of the same colour can create a stunning visual impact. Mixing up styles and textures creates a playful and vibrant result, whereas choosing glass from the one collection allows you to have a cohesive look that works well for more naturalistic artistic designs.
4. Prepare your mosaic surface. If your mosaic is going to be a functional piece, like a bird bath or pot plant holder, waterproofing your surface is a good idea. This will ensure that water exposure will not damage the mosaic over time. Our waterproof additive makes this process seamless.

Ok! You’ve got your glass, have prepped your surface - now you’re ready to get mosaicing!
This is when you can let your imagination run wild. If you’re a newbie to mosaics, you might like to start with a simple, repetitive pattern using colours or shapes to create interest. To create unique shapes with your glass you’ll need good quality glass cutters, also known as mosaic wheel nippers. You can find ours here.
If you haven’t used glass cutters before and would like some guidance, check out our How To Cut Mosaic Tiles glass cutter tutorial here.
Make your mosaic
1. Lay a section of your tiles on your base to make sure your pattern looks how you imagined it would.
2. Squeeze a blob of glue about the ¼ of the size of your tile and glue it into place. Press lightly and evenly on the tile to get it into place. The glue should just squeeze out under the tile about a mm when pressed down. You want your tile to rest on a little pillow of glue and not directly touch the base.
3. Continue to fill in your mosaic, glueing down each section as you go. Try to leave a 2-3mm gap between each tile. This is where the grout will go.
4. Leave for 1 hour for the glue to set.
5. Following the instructions on your grout packet, mix your grout to a smooth, toothpaste consistency. A rough guide to follow is 150ml of water to 500g of superfine grout. You can read more about grouting uneven surfaces here.
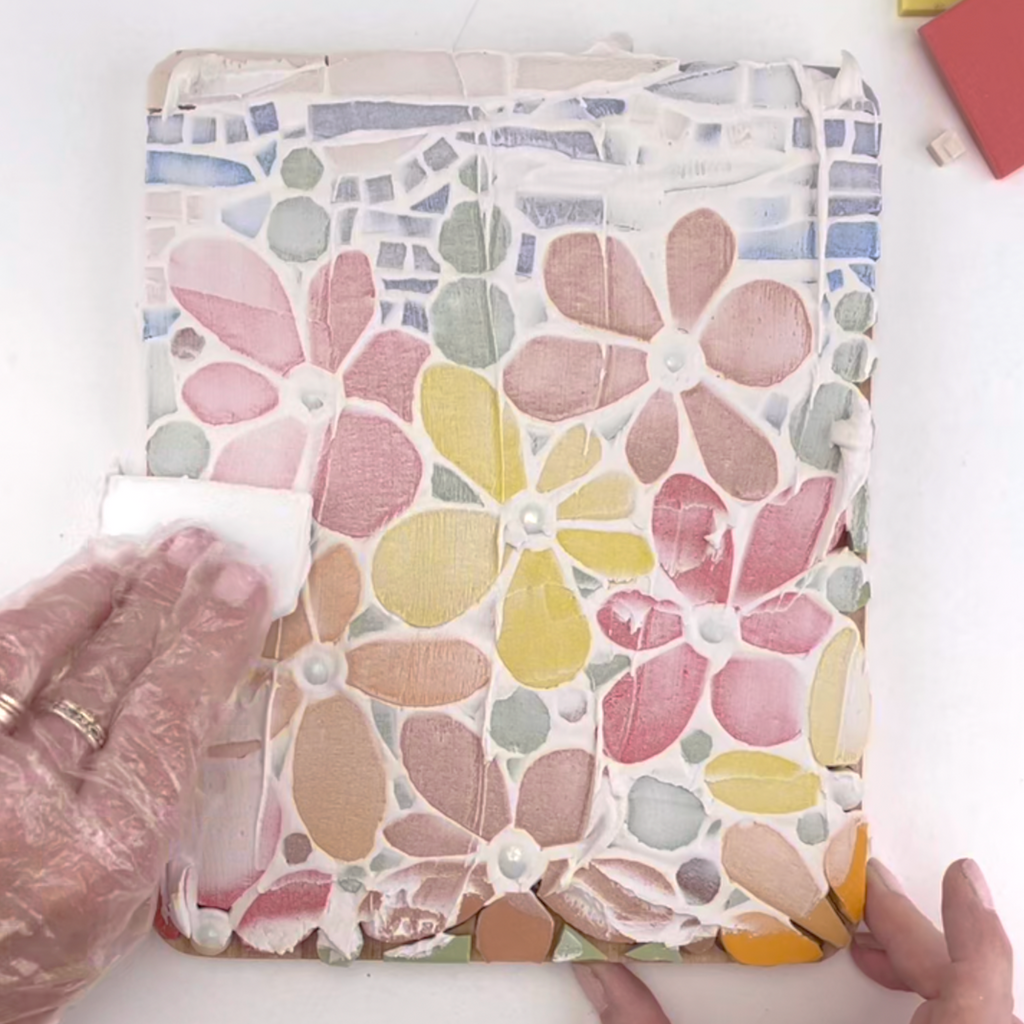
6. Apply the grout to your mosaic surface with a soft, flexible squeegee. You can find our recommended one here. Smooth over the surface with a damp sponge and allow 1 hour to dry.
7. Once your grout is dry, take a slightly dampened cloth and polish your surface to reveal your beautiful mosaic!

(Spiral birdbath created by Paulette's Teacups)
Here at Mandala Art Mosaics, we have created mosaic craft kits and mosaic supplies that are suitable for beginners right through to the more advanced mosaic artist. So wherever you are starting your mosaic journey, we have something for everyone.
We also stock a select range of our mosaic supplies, along with our mosaic craft kits in the craft aisle of your local Bunnings Warehouse!
Stay happy and keep creating!